 The Techxperts™ here at Goodson frequently get questions about how to properly set a dial bore gauge so we decided to devote this edition of Tech Notes to the basics and some tips to make it easier.
Setting a dial bore gauge is a simple concept
- Set a micrometer to the size bore you will be testing
- Set up the dial bore gauge with the extensions necessary for the bore diameter
- Place the bore gauge between the micrometer’s spindle and anvil
- Rock the dial bore gauge back and forth and side to side in the micrometer.
- Note the minimum reading and zero the dial indicator to that reading
Sounds simple, doesn’t it? With the proper tools it is.
We’ve found that one of the more difficult ways to set a dial bore gauge is manually. You’ve probably done this – you hold a micrometer in one hand and the dial bore gauge in the other. Sounds simple, but it gets pretty tough to zero the dial reading when both of your hands are already busy. All you need is a third hand!
Since most of us aren’t likely to grow a third hand, we need to find an alternative. Machinists, being the inventive folks they are, have come up with some tricks.
Most shops have a vise on the bench that can be used to hold the micrometer steady. Just be sure to wrap the mic in a shop towel or use a vise with rubber pads so that you don’t damage the mic. This simplifies the process since your vise is acting as that third hand. You’ll still need to do a bit of a balancing act to zero the dial because the round point on the gauge extension is going to want to slide off of the micrometer spindle.
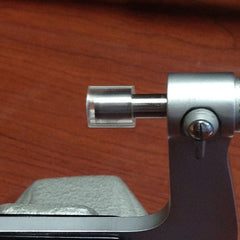 A quick (and inexpensive) trick to make this a little easier is to slip a short piece of 1/4” ID hose over the micrometer spindle. Let it extend just enough to let the tip of the extension slip inside, stabilizing the whole assembly. Now this is not going to hold the dial bore gauge all by itself but it will make it harder for the extension and the spindle to slip apart. Don’t worry, this little piece of hose won’t affect the reading of the micrometer or the dial bore gauge.
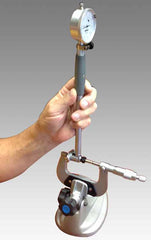
Another quick tip that came from an old machinist is to mount the dial bore gauge in the vise and apply the micrometer. In this case, you’ll be rocking the micrometer instead of the dial bore gauge, but you might find this works better for you. Again, be sure to protect the shaft of the dial bore gauge from damage when you mount it in the vise. This technique will also work with a Micrometer Stand.
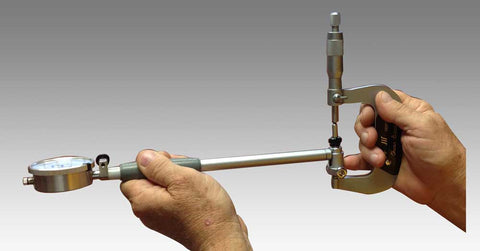
 Designed on a similar principle is the Micrometer Stand (MIC-FIX), commonly called a “third hand”. This tool is designed to hold just about any type of micrometer (up to .500” thick” in its rubber padded jaws. Tighten the knob so it’s snug, but not too tight and the micrometer will stay put.
 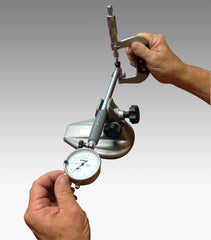 An advantage of using the stand is that you can adjust the angle of the jaws to make it easier to see the micrometer and work with the dial bore gauge. The jaws in the Goodson model adjust about 30° in either direction.
A step up from these two options is to use a Dial Bore Gauge Setting Fixture. Sunnen® offers its own setting fixture which is also available from Goodson. These setting fixtures have built in micrometers and standards so you can set up for bores from 2” to 6” diameters.

Setting Fixtures work on the same principle as the vise and the micrometer holder, but they are dedicated specifically to setting up dial bore gauges. Before you can use the fixture to set up your bore gauge, you’ll need to set up the setting fixture. For those instructions, download or view the product instructions.
You may also want to check out the step-by-step instructions on assembling a Dial Bore Gauge.