by Goodson Tools & Supplies
One of the most significant features of aluminum die-cast engine blocks is that they don't require steel or cast iron liners in the cylinder bores. Particles of pure silicon, averaging about .001" in diameter are dispersed throughout the engine block. As silicon is very hard, there will be very little wear in the cylinder bores. In fact, as far as pistons and rings are concerned, the cylinder wall IS silicon; the aluminum's function is simply to hold the silicon particles.
Reconditioning Hints
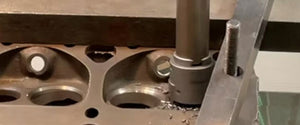
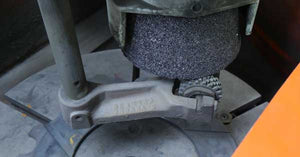
If cylinder bores in these blocks become excessively worn or scored, they can be honed to accept oversize pistons. Unfortunately, the sizing and finishing processes you would normally use leave cylinder wall of silicon and aluminum. The silicon particles no longer protrude from the aluminum.
To achieve the proper surface for compatibility with the rings and pistons you will need to prepare the cylinder bores so the silicon particles protrude. This allows the pistons and rings to only contact silicon. A special conditioning operation is required to remove the aluminum from between the silicon particles.
Read more →

 Lubricate the seal before installation.