As seen in Engine Builder Magazine
There’s an old saying in the machine shop world, “You can’t machine until it’s clean.” Let’s face it; you can’t even really do a basic diagnosis until the work piece is clean. Yes, you can see a burnt valve, maybe even a big crack, but until that rascal is totally clean you’re only guessing about why it failed.
There are a lot of hot tanks and jet washers used every day in the shop. They seem to have gone full circle. The main cleaning process used to be the hot tank, then the jet washer made in-roads, then thermo-cleaning, and now ultrasonic cleaning machines are popping up in a variety of shops. However, there seems to be a move back to jet washers.
Hot Tank Basics
The hot tank is the basic cleaning machine. Some have an agitator to move the parts inside a vat of a heated chemical solution. With enough time you get a somewhat clean work piece. If your hot tank doesn’t have agitation you need to create some. One of the easiest ways is to run an air line into the solution. Put an air regulator on it and allow about 25 – 30 PSI to bubble your hot tank solution. This will speed the cleaning process by about 35%.
If your hot tank doesn’t have a thermometer, get one or at least use an infrared temperature gun to ensure your tank is about 160°F. Be sure to mix your solution correctly and periodically take a pH test to confirm that the ratio of chemical to water is right – about 12 on the pH scale. I suggest starting weak and working up to the recommended strength. If you mix too much chemical into the water it won’t clean. In this case more is NOT better.  Periodically you will need to add water, as evaporation will occur. Always use a pH test strip to ensure the mix is correct. For more on the importance of pH on your cleaning solutions, read our article: Performing a Proper pH Test.
Hot tanks are relatively maintenance free; however certain areas still need to be checked. Grease agitation joints or fittings and make sure your gas burner tube is clean on the inside as well the outside. If it’s gas fired you will also need to wire brush the outside of your burner tube. Next time you drain your hot tank, wire brush the electric heating elements to clean off the gunk, this will speed the heating process. Also periodically scoop the settled residue from the tank. There’s no need to waste cleaning solution on gunk in the bottom of your tank. Remember residue or gunk isolates and insulates.
TLC for the Jet Washer
Jet washers need maintenance too. They have a lot of moving parts – turntables, pumps, water nozzles, etc. All of these components need to be maintained to provide fast, thorough, trouble-free cleaning. Jet washers use three ingredients – pressure, heat and chemicals – to do their intended job.
I recommend you completely drain and clean your jet washer at least twice a year. You may need to do it more often according to the demand you’re putting on your machine.
Drain the tank, and remove the gunk. You may need to use a scoop shovel or hoe to get all of it. Next, high-pressure rinse the inside of the machine. Remove the grates and pressure rinse the interior of the water reservoir. This is a good time to wire brush the electric heating elements and scrape or wire brush the burner tube. Take the time to clean the grates, removing old gaskets and valve stem seals.
Now remove the nozzles from the water manifold. Inspect it for material that could clog the lines and use a small diameter wire to clean each nozzle. The nozzles are great places for little bits of silicon to hide and when that happens your cleaning is not as complete as it should be. Keep the nozzles out until you have refilled the tank with water. Do NOT turn on the heat yet. Close the door and push the pump button and flush the entire manifold system. This will clean any additional foreign matter from the manifold system. Now you can re-install the nozzles.
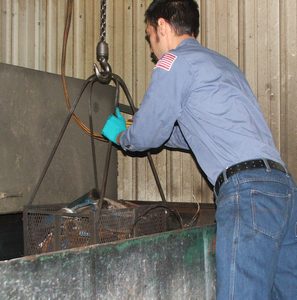
Next, grease the turntable bearings and the pump if it has grease zerks. Grease according to the manufacturer’s recommendations. Inspect the door seals and replace if needed. Also make sure the safety limit switches are working. There’s nothing worse that having an employee open the door and get hit with a bath of scalding hot chemically treated water. Remember to have your workers dress for the job. Wear eye protection, shoulder length gloves and a rubber protective apron with rubber steeled toe boots. This will provide protection in the event of a problem.
It’s also important to wipe down the outside of your jet washer. This will give you a look a t welded seams to see if there are any minor leaks that you can repair before they make your whole shop a cleaning tank.
Turn on the heating elements or light the burner tube and bring your tank up to operating temperature. Most jet washers work best between 160°F and 190°F. Mix your jet wash solution according to the manufacturer’s recommendations. Again, it’s better to mix weak at first and creep up on the proper ratio of water to chemical. If you mix too strong the machine will not clean. Do not breathe the dust from the chemical you are using. It burns like heck and can really ruin your day. Remember, you are carbon based. It WILL clean your clock.
Remember the pH test. The ideal is 12 on the pH scale. Add chemical until you have achieve this rating. Make sure the temperature is correct. You may want to confirm the temperature with an infrared thermometer to be sure that the thermostat is working correctly. Turn on the pump and let the jet washer run about five minutes. Open the door and inspect the inside for any debris that has been ejected from the manifold system. Load the turntable with components and turn on the pump and timer. After the cycle is complete you should have very clean work pieces.
Check for foaming, which means a couple of things. Either the solution is not mixed correctly or the temperature is not correct. If you find all is well and you still have foaming, add some de-foamer.
It all boils down to this…a clean and well-maintained cleaning machine will do it intended job quickly and efficiently. If it’s not maintained properly you’ll spend more labor cleaning the work piece by hand after it comes out. Remember, “We can’t machine until it’s clean.
Pre-cleaning
This is a very important step as you prep the engine block for cleaning by actually pre-cleaning. One of the most important areas for pre-cleaning is the oil galleries. These passages will build up sludge and crud and must be pre-cleaned prior to going into the jet washer or hot tank. Goodson developed the latest method for cleaning oil galleries with the HPOG Cleaning System. Now with the combined effort of both air and water plus the turbo action created by the circle drilled air/water outlets you can efficiently and effectively clean the hard to clean oil galleries. Plus with the addition of newly sized nylon brushes we have expanded and the ability of the HPOG for cleaning lifter bores as well as cylinder bores. The HPOG has become the go to cleaning system for oil galleries and other hard to reach areas of the many engine components you deal with each and every day.
Disassembled work pieces will come out cleaner than assembled work pieces. Be sure to remove the oil gallery plugs and run a long stemmed brush through to loosen any residue prior to jet washing. Remove any big chunks of gasket material or crud by hand using a gasket scraper or wire brush. Try to remove as much silicon as possible prior to washing. This will prevent that silicon from clogging up your nozzles. Also remove the VSIs and valve stem seals from the cylinder head. You can put the smaller components into a small parts basket and clean them with the head or block. Mark or tag all components to be sure nothing gets lost and tie down any tin ware to keep it from blowing around inside the jet washer.
Remember to use an aluminum-safe chemical for non-iron components. If your aluminum components are turning black you either have the wrong chemical or the mix is too strong. Remember if it’s too strong you need to remove some of the solution and add fresh water to get the ratio correct.
In a perfect world you would have two jet washers. One for heavy duty cleaning and one for the final rinse prior to assembly. A maintenance schedule should be created for each unit. Protection of components when they are clean is critical. Rinse the components thoroughly. If they are not going to be machined right away spray a light coating of rust preventive on any exposed machined surface. Make sure you tag all components so they stay with the other components, as the job approaches competition.
On a final note, keep the cleaning area clean and organized. Wipe up spills and oil or grease to prevent any accidents. Protect your employees by making sure they are dressed properly to work in the cleaning room.
Don’t forget, if you have more questions, email the Goodson Tech Department or call, 1-800-533-8010.