By Dave Monyhan, retired
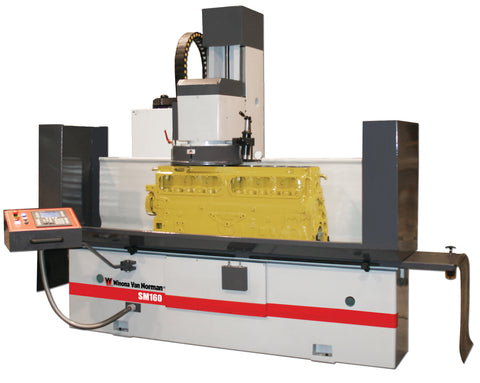 Today we’re going to talk about resurfacing machines for cylinder heads and blocks. These machines come in variety of styles and configurations as well as many colors. There are belt grinders, dry grinders, wet grinders, broaches and mills. There are different designs from under-head to over-head types. These machines use coated or formed abrasives, some use carbide and later styles or models use CBN or PCD, some use coolant and some are operated dry. Despite these differences, they all have two things in common; they make a warped surface flat and they need the same care and attention when it comes to the daily maintenance necessary to maintain their accuracy and dependability.
Getting Started
All of these machines have beds or tables that you mount the work piece to. They all use similar type tooling for the mounting of the work piece. This tooling needs to be qualified to the machine to insure accurate set up.
Leveling Your Machine
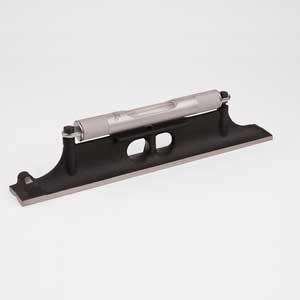 For most machines you will do a four-point level. I recommend using a 12″ Starret level. Before you begin you need to be sure your level is calibrated. To see if your level is accurate simply place it on a surface you know is flat and take a reading. Then reverse your level 180 degrees. The reading should repeat. Even if the bubble isn’t directly in the middle as long as the reading repeats you know that the level is accurate. If it doesn’t repeat, do a quick calibration. Take a reading to determine how far the level is off. Now adjust the level, splitting the difference that it’s off. Again set the level back down on a surface, turn it 180 degrees and keep adjusting until it repeats. Now you’re on the level! Set your level on the ways of your machine or on the mounting surface of the table. Adjust the machine front to back as well as left to right. When you’re done all surfaces should read level. Double-check to be sure that the level repeats. If it repeats in all directions and the bubble now stays in the middle, you have achieved level.
True the table
Now it’s time to determine if the table is running true. Mount a magnetic base dial indicator in the wheel head and touch it to the table surface. Traverse the table left and right to determine if the table is true to the wheel head. The table should run true at less than .002″ down the entire traverse of the table. If the table is off you will need to consult with the manufacturer to get the correction procedure.
Check Oil Levels
This is also a good time to check the level of the way oil in the oil cups under the table. You will notice a wooden roller that acts as a wicking device that coats oil on to the bottom of the flat and v-way of the table, providing a lubrication film for the table to ride on during the traverse.
Check the Parallels
Next, its time to check the parallels to see how true they are. Again using a dial indicator and granite plate, sweep the parallels to determine if they are true. If they have run-out, the work piece will not be surfaced correctly. You may have to machine them true using a Bridgeport or other industrial-type machine.
Indicate the Cylinder Head/Block Rollover Clamps
Now let’s indicate the cylinder head/block rollover clamps. Check these in the same manner you did for the table and parallels. Again, you may be making corrections on the Bridgeport machine. You’ll then want to indicate the rollover bar to insure it’s not bent. You may be surprised to find these mounting components aren’t true. But it’s better to know where you are rather than wondering where you’ll end up. That’s why you’re reading this article. It’s better late than never. Remember if your tooling is true then your work will be true.
Deburr your tooling
Always deburr your tooling with deburring stones, as this will clean up the nicks and other imperfections created during set up. Also deburr the table to remove imperfections that will affect your tooling set-up, which will ultimately affect the finished piece. Once all of the tooling has been measured and corrected you can reinstall it knowing that your next surface job will be set up accurately.
Inspect the Grinding Head
Most grinding heads are held on with a tapered spindle and lock nut. When you replace the stones it’s a good time to remove and clean out all the bolt holes. You will want to run a tap into the threaded holes to clean out any gunk that has accumulated. Also inspect the wedge blocks for nicks and burrs. Deburr as necessary. Re-mount the head and install the new stones, make sure your new stones have good blotters on them. Never mount a grinding stone without a blotter. The blotter takes up any clearance and prevents the stones from loosening during the grinding operation. Snug up the bolts being sure not to over tighten, causing the stones to break.
Big Caution! Never allow more than 1″ to 1-1/4″ of stone protrusion to extend below the clamping wedges. If you do, you may experience a few fragments in the drywall or worse, in your face. As always wear safety glasses or a safety face shield. Always be safe! After you’ve properly mounted the new stones test run the wheel head. Turn on the coolant and let it run for about two minutes. Shut everything down and recheck the segments. Tighten again as necessary. Run the machine again and recheck the bolts one more time and you should be ready to go.
Dress The Stones Properly for Longer Life
Dressing the stones is accomplished using a star type dresser generally mounted on the wheel head. This dresser is designed to dress the segments or stone in the manner designed by the manufacturer. Remember that the star-type dresser is designed to rotate. If it doesn’t rotate, get a new one right away. If your machine is equipped with a diamond dresser, check to make sure the diamond has a sharp point and be sure to rotate it on a regular basis. Keep in mind that your dressing technique can affect the way the grinding wheel acts. Fast dressing will give more grinding ability but the finish may suffer. Slow dressing will give you the finish, but it may cause the wheel to load up and require additional dressing. Adjust your technique according to the type of material you are grinding.
Clean the Coolant Reservoir
 If your machine uses coolant take the time to clean out the coolant reservoir, wipe down the table and drain back the galleys. Use a microbiostat to eliminate or kill the bacteria. It’s the bacteria that cause the odor in your shop, especially during the more humid months. If you keep your coolant at its proper mixture and periodically clean the reservoir this nasty smell will not waft throughout your shop.
A clever way to rinse down the work piece as well as the inside of the grinding machine is to attach a split tee to the coolant feed line and attaching a small length of garden hose with a spray nozzle. This allows you to get to all areas for a rinse after each job. Take the time to flush the coolant hoses as they also contain bacteria. And don’t forget to wipe down the splashguards or curtains.
If your machine is equipped with a hydraulic table you will need to periodically check the hydraulic fluid levels and clean or change the hydraulic fluid filter. If your machine has a mechanical feed then you’ll need to make adjustments to the belt drive. If it’s a direct drive then you need to check the fluid in the gearbox on a semi annual basis.
Adjust the Machine Tilt
The tilt of your machine needs to be adjusted according to the manufacturer’s instructions. All grinders have a leading edge in reference to the position of the grinding wheel. In general, the grinding head is tilted as much as .005″ to .015″ left to right and zero front to back. Always check the manual for how to set the tilt on your machine. If you experience dragging or a back cutting pattern this is an indication that the head tilt is out of adjustment.
Older machines using a solid grinding wheel require similar maintenance such as cleaning the coolant, checking the bolt holes to insure they are clean, removing any rust or scale from the mounting surface prior to mounting the new wheel.
If you have a broach, that means you have carbide tips that do the cutting. These tips need to be sharp and set correctly. Mount a magnetic base dial indicator and set them according to the manufacturer. A good rule of thumb is all tips should be within .0005″ for a proper finish. Keep in mind broaches are extremely sensitive to level. You must do a complete four-point level to achieve the desired finish results.
CBN and PCD, the Newer Alternatives
There has been quite a rush to CBN (Cubic Boron Nitride) in cutting iron in the last ten years. Some machines are just wet grinders converted to use a CBN bit. Others have been designed to be a CBN cutting machine. Set up is critical when using CBN. The aggressive cutting action it delivers is directly related to how true the set up is and how conscientious the operator is.
CBN, an ultra-hard cutting material consisting of polycrystalline cubic boron nitride with a metallic or ceramic binder is primarily used to machine hardened ferrous material. It’s available either as a tip brazed to a carbide insert carrier or as a solid insert.
CBN has its limitations. It likes to cut large amounts of material with out interruption. Guess what? The average cylinder head or block has many holes that interrupt the cutting action of the tool bit. With that in mind it’s even more critical to have correct speeds and feeds on your surfacer to adjust for machining cylinder heads and blocks. CBN must be driven by rigid machine tools with secure holding fixtures. As I stated earlier, some CBN machines are simply converted wet grinders, and others are designed as CBN machine. But not all CBN tips are the same. The purity of CBN content separates price from quality. I recommend the titanium coated CBN tips, due to the witness mark left on the tip after you have surfaced a workpiece. Plus the titanium coating delivers longer life. These tips can be rotated about every 2-3 degrees so you can get the maximum life out of the tip. Plus if you’re using a solid CBN tip, after one side is worn out you simply flip it over and use it again. It’s essential that when you rotate the tip, that the holder is clean and the holding finger is sound. There’s nothing worse than having your machine throw a $250 tool bit somewhere in the shop, because chances are you are not going to find it. CBN can also be sharpened. If the tip isn’t fractured, it can be lapped back to spec, extending the life of the tip.
PCD (Polycrystalline Diamond) is an ultra-hard tool material (substrate) consisting of a synthetic polycrystalline diamond tip brazed to a carbide insert carrier. Primarily used to machine non-ferrous materials at high speeds, PCD has been developed specifically to machine aluminum. CBN only smears the aluminum when removing metal without producing the necessary finish today’s aluminum heads require. To extend the life of your tooling, use adequate lubrication.
Keep your tooling organized
Well-organized tooling is essential. If you have to chase around the shop to find the necessary bolts, washers and tee nuts, it just adds time to the job. Either get a tool board from the manufacturer or build a tool board right next to the machine. Check your mounting hardware for nicks, burrs and thread damage and replace or fix as required. There is nothing worse than having a job get tossed out of the machine with tooling failure due to lack of maintenance.
You may think that all I preach is maintenance, maintenance and more maintenance. However, without continued maintenance of your machines, you will not be getting the desired results your customers expect when it come to surfacing their components. Remember a clean and well-maintained machine will deliver many years of accurate service. Plus it will have more resale value when it’s time to upgrade.
Don’t forget, if you have more questions, contact the Goodson Tech Department at 1-800-533-8010.